

05 Mar How to integrate MailChimp and WordPress – The Comprehensive Guide
If you are looking for ways to build your online presence, the email list is one of the first things that you should start with. It doesn’t matter if you are getting a large number of search engine traffic; it is the subscribers that keep your blog alive for a long time.. Creating a subscribers list is nothing to play around with, and requires a good choice of tools.
If you are reading this article, It is wise to guess that WordPress and MailChimp are the two tools that can be used to create an easy to use subscribers list.
For the uninitiated, MailChimp is the one of the leading email service providers. WordPress, on the other hand, is the most popular CMS for creating websites. Now, we can easily use both the most powerful tools in their respective functionality to create a seamless experience for creating the subscribers list.
In this guide, we will go through a simple WordPress and MailChimp integration and look for ways in which the combination can be improved.
Before we jump into the guide, let’s look for reasons why you should use MailChimp for WordPress.
Reasons to use MailChimp for WordPress
Along with MailChimp, there are also many email service providers. So, what does MailChimp our top service to create subscribers list? Let’s check the list below to understand its importance and the choice that we had made and you should too!
- Works seamlessly between the WordPress and MailChimp database. No corruptions or compatibility issues.
- The plugin is free to use! You don’t have to pay anything to get started.
- MailChimp comes with a simple to use email subscription widget. A very handy tool indeed!
- Designing emails and starting off campaign is very simple and can be managed either from the WordPress or the Mailchimp website.
- Tons of analytics to fiddle with. Understand how your audience reacts to different media and serve them better with A/B testing.
And much more. To check the awesome list of what MailChimp is capable off, check out this post from MailChimp.
How to integrate MailChimp and WordPress
Getting the Plugin from the Repository
Our first step will be to get the plugin installed. You can install the plugin by going to the official WordPress plugin page. Download the plugin and install it by going to the plugin page. Click on “Add new plugin” and then upload.
After uploading, you need to activate the plugin to make it work for the first time.
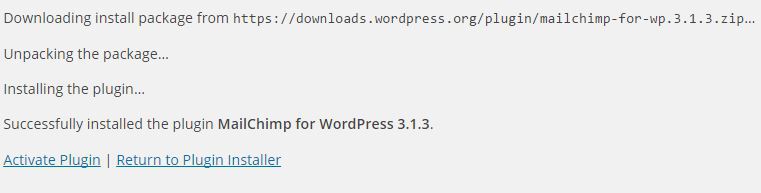
You can also install from the dashboard. For this, you need to go to Plugins>> Add New >> and search for “MailChimp for WordPress.” Now, you can easily click on install button and proceed with the installation.
After the plugin is activated, you can go to “MailChimp for WP” in the left sidebar and start working.
Getting the MailChimp API
MailChimp requires an API key to function properly. To grab the key, you need to click on “Get your API Key here” as shown in the screenshot below.
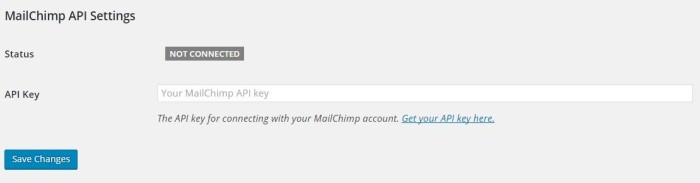
Using MailChimp means maintaining an account. And, that’s okay. Once you click on getting the API key, you will be redirected to MailChimp website. After registering, you will get access to your API key.
All you need to do is copy and paste it into the plugin dashboard.
Once you are connected, you will not be able to fiddle with the plugin. Let’s get started.
Getting Started With MailChimp
Without much delay, let’s get started with MailChimp. MailChimp lets you create campaigns, design emails, and gain subscribers. But, before you start getting the benefits, you need to integrate MailChimp with WordPress.
Creating Your First Email List
With everything done, it is now time to begin with the email list creation. Email list helps you to keep track of the subscribers. Without them, it is not possible for you to make subscription possible.
To create the list, you need to fill the List name and other important details such as “default from email”, “default from name”, Company name, address and other vital information.
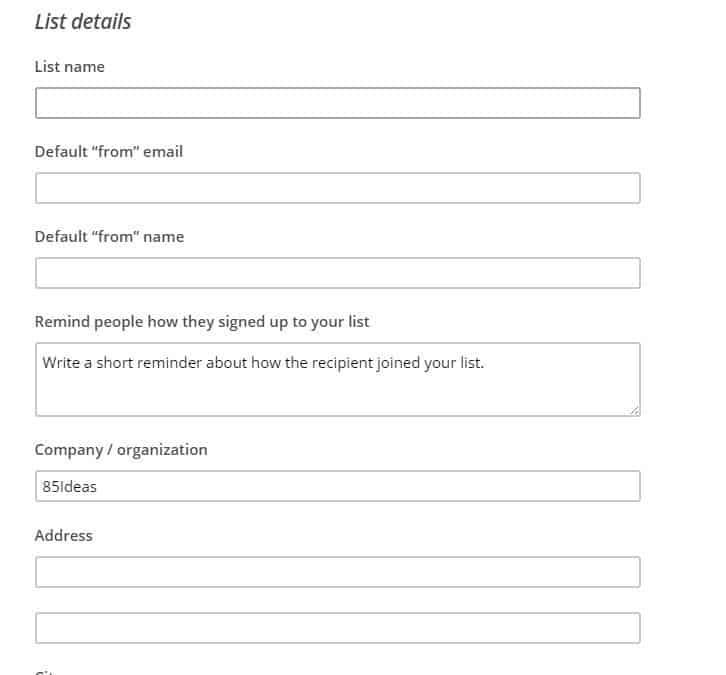
Below the form, there is notification section. The notifications will be sent to your primary email address or any email address that you want to choose. You can get notified with a daily summary or when someone subscribe or unsubscribe from the list. For starters, it is a good idea to go for a daily summary. It will keep your email clean, and you will not get bombarded with subscribe email alerts.
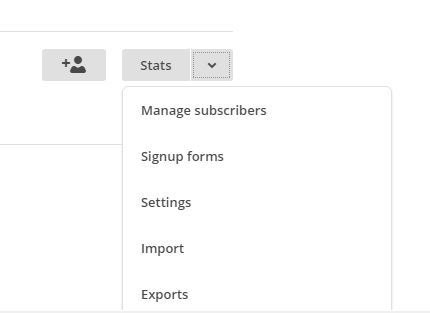
Creating SignUp Forms
Our next step is to create signup forms. The inbuilt option is very useful as you can quickly create a form for subscribers to opt-in. To create the signup form, create the down arrow button on the generated list.
 Clicking on the signup form will provide you some basic information such as width, height and the field name for the submit button. Once done, you will get a code to copy paste on the website.
To make it appear on the site, you need to go to the widget section by click on the “Appearance” >> “Widget” and then create a text widget.
Put a simple Title for the widget and then paste the code into the main widget area. The code insertion will activate the widget, and you will get a nice subscribe form for your blog. Awesome, right?
Learning More Intricate Parts
MailChimp is a great plugin; you can create an amazing newsletter with the tools provided within the tool. To make the most out of the plugin, you need to use the official website of MailChimp. The website is the home of everything you would ever need.
On its website, you can create campaigns, templates, lists, reports and automation. That said, you need to learn how stuff works.
Importing List
If your blog is not new or you have been using a different subscription type, you can import the old subscribers list to MailChimp account. To import the file, you need to do the following steps.
- Export your existing list either in CSV format or a delimited text file.
- Upload the file to MailChimp with the simple upload option.
- Edit the necessary field in the uploaded text file.
- MailChimp supports different types of 3rd party services, and they directly support the import features. For example, you can use Google Docs, SalesForce, etc.
Templates And Campaign
Newsletters are the key to engaging your subscribed audience. For starters, creating newsletters can be a daunting task. It is time-consuming and requires a lot of effort on the part of the webmaster. MailChimp provides templates to smoothen the process. With templates, you can quickly build newsletter and send it with a single click.
But there is a more to templates. Templates are an integral part of Campaign and can be used to serve successfull newsletter, email message or an e-shot to the subscribers.
You can create a template or import a template of your choice.
Let’s take a closer look at template creation.
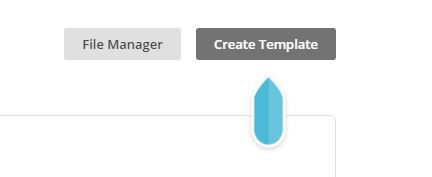
Click on the “Create Template” button will get you started. Once clicked, you will be asked to choose a sample template to work with. For tutorial purposes, we will use 1 column drag and drop template. It is simple and hence a great template for tutorial purposes.
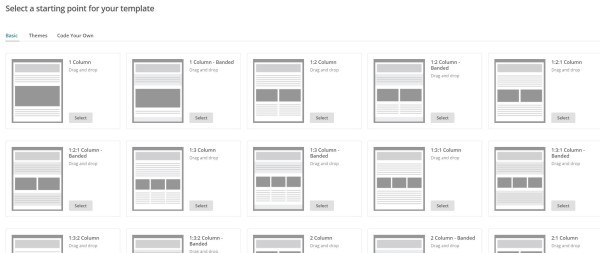
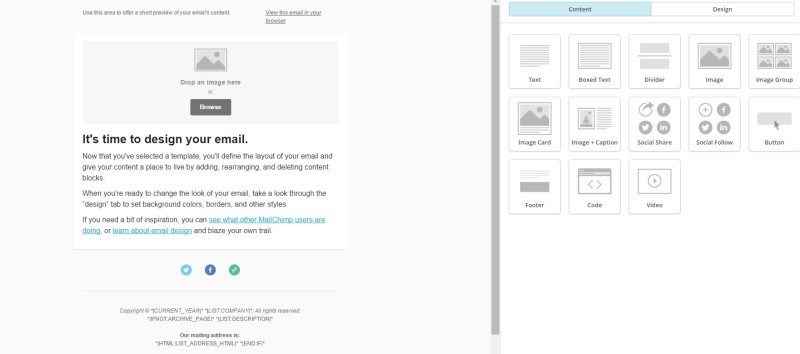
You can also use themes or code your template if you feel that your requirement is not meet with the already provided templates. Once loaded, you will get a divided window. The left side contains the template itself, and the right side contains all the content and design elements.
As I have mentioned earlier, the template supports drag and drop feature.
After the template is created, you can use it in the campaign.
Campaign creation is easy and is done using a wizard. Currently, there are four campaign types available in MailChimp. They are regular campaigns, plain-text campaigns, A/B testing Campaigns, and RSS campaigns. The campaigns are self-explanatory and can be used to make the most out of your subscribers list.
You can easily get more information from the knowledge base of MailChimp here. It describes the different type of campaign and the essential difference between Campaign vs. Template.
Finalizing the Campaign
Campaign creation is a great experience, but now you need to send the newsletter to your subscribers to make the effort worth anything. You can use the confirm button to finish the campaign. MailChimp will now look for any errors and notify you if anything problems are found.
The last step is to schedule the campaign. Scheduling can be done by setting the date and time. If you are a paid user, you get access to three more options such as Send Time Optimization, Timewarp, and Batch Delivery.
Bonus: Case Study
While all this probably made sense, let’s take a look at a real-life example of how other website owners are using the mailing list to drive traffic, conversions, and sales. I always find that examples are easy ways to put into context how you yourself can leverage the information we provide.

Our friends over at rideshareapps.com just recently launched a comprehensive guide to Lyft promo codes. Now at first glance, this page appears to be a simple way for the site to make money. Take a second look, however, and notice that this page has tons of links back to it. How did a simple promotional page get so much traffic and become one of the first pages in Google for a highly competitive keyword? The email list.
Each week the content managers send out an email about new content and promotions on the site. And because the site is collecting email addresses using SumoMe’s Welcome Mat, which topped our list of best email list-building plugins, they have a massive email list that these emails go out to.
Once they send out these emails, they get picked up by huge players in the industry, such as Stopuber, Ridester, Rideshareowl, and get quite a few links back to their content organically. In addition, they also benefit from having the traffic driven from their email list, and as that increases, so do conversions and earnings.
Wrapping Up
MailChimp is one of the best newsletter services for any platform out there. It works ideally for WordPress because of the plugin environment. We went through the comprehensive guide on how to integrate MailChimp with WordPress. We also saw how to get basic templates and campaigns running. If you are still confused on configuring and getting started, it is a good idea to check the knowledge base of MailChimp that covers an in-depth guide to getting started with MailChimp.
I hope you liked the article. If you still have any questions, don’t forget to use the comment section below. Also, share the article with your friends!
No Comments