


18 Feb How to Add WordPress Author Box Without Plugin
WordPress has a huge and rich plugins database, and you can find pretty much anything you need for your site. Among the thousands of plugins that you can install on your website, there are plenty of them offering you to automatically generate and place an author box on your web page.
However, you can add author boxes manually, all by yourself, without using any plugin. Therefore, in this article, I will show you how to add an author box manually to your website and compare it with a plugin. Before the comparison part, it is crucial to explain what author boxes are and what they are used for.
What Is the Author Box and Why Do You Need One
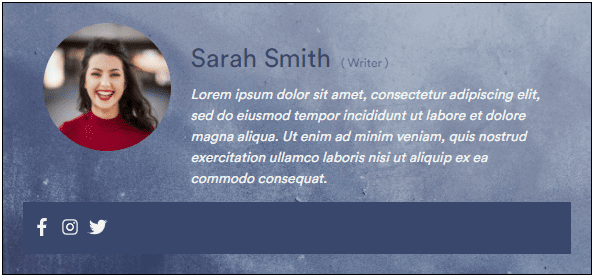
 You might be wondering what an author box is and what benefits it brings to you? In a nutshell, an author box is a little box that appears at the bottom of your WordPress page and shows some important information about the author of the post. Every author box shows the author’s name, short bio description, social contact links, email, a gravatar, and the navigation link to the previously published posts.
But, what is their primary use? Author boxes are an important part of your website because they inform the reader about who wrote the posts, thus giving credibility and making your posts more trustworthy in the eyes of the readers.
Let’s proceed to the next section, where we will cover the process of adding a WordPress author box manually, without a plugin.
Add WordPress Author Box Without Plugin
In order to add WordPress author box without plugin requires you to insert a couple of lines of code. Thus, you need to make a few modifications to the files “single.php” and “functions.php.” If you don’t know where to look up those files, you can easily find them through the WordPress dashboard.
However, if you go for this method of adding an author box, you should be very careful because even one mistake can lead to the complete crash of your website. Therefore, to keep your website safe and crash-free, we recommend you use a plugin WPReset that will generate a backup file for you to restore your website to the point before the crash occurs.
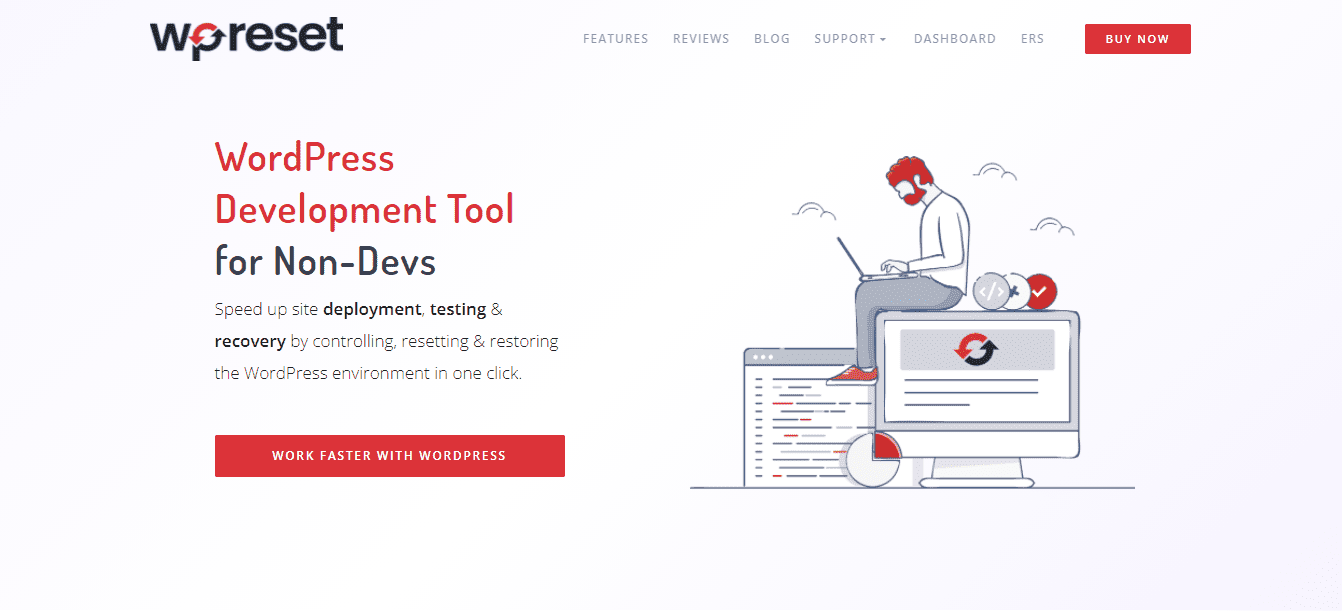 WPReset can fix any error you may encounter and save you from losing your website files. This way, any mistake you make during the modification part will not affect your website because you can always revert the process to the point when your website works fine and error-free. If you choose this option, you need to be familiar with Theme Editor.
However, if you prefer FTP over WordPress dashboard, you need an FTP tool. The FTP option is way safer and more beginner-friendly. Before you start adding an author box to your website manually, you need to make sure some of the pre-steps are done first:
- Go to your WordPress Admin Dashboard
- Select “User” from the tab
- Hover over the name of the author and click “Edit user page”
- Now, fill out the fields with information about the respective author (email, website, bio, profile picture
- Hit “Update user”
- You are done!
Once you have those steps done for as many authors as you need, you can proceed to the next part of the process.
Now, follow the next steps below:
- Head over to the “Appearance” tab in the admin dashboard
- Click on “Theme editor”
- Navigate to the “single.php” file and open it up
- Once you have it opened, scroll through the file and locate the function named “the_content()”
- Above the main “<div>” container and below the mentioned “the_content()” function, paste the following code:
<div class=”about-author”>
<div class=”about-author-image”>
<?php echo get_avatar(get_the_author_meta(‘ID’), 250); ?>
</div>
<div class=”about-author-text”>
<h3>About <?php echo get_the_author_meta( ‘display_name’); ?></h3>
<?php echo wpautop(get_the_author_meta(‘description’)); ?>
<a href=”<?php echo get_author_posts_url(get_the_author_meta(‘ID’)); ?>”>View all posts by <?php the_author(); ?></a>
</div>
</div>
Code explanation:
The div “about-author” is the main container of an author box, and it holds everything inside of it. The two internal divs, “about-author-image” and “about-author-text,” contain the author’s gravatar image and bio. We also see a function “get_the_author_meta,” which takes two parameters (ID of an author) and the size of the author’s gravatar in pixels. Once you insert the code, an author box should appear on your posts page, but you may not be satisfied with how it looks.
 So, in order to change its appearance you can do it using CSS code below:
.about-author {
background-color: #f8f9fa;
padding: 20px; }
.about-author::after {
content: “”;
clear: both;
display: table; }
.about-author-image {
float: left;
width: 20%; }
.about-author-text {
float: right;
width: 75%; }
Note: Always make a backup before doing any serious changes to your website. Additionally, it would be more effective if you activate maintenance mode on your website while performing those significant changes. You can do it pretty easily using the plugin Coming Soon & Maintenance Mode.
 Use a Plugin to Make Professional Author Boxes
So far, we have mentioned what an author box is and how to add WordPress author box without plugin. However, we will show you a fantastic WP plugin that automates the whole process in this section. In other words, you don’t have to bother with inserting code or writing customized CSS code.
Simple Author Box Pro does all of that for you in a few clicks. It is a WP plugin that automatically adds an author box to a website, fully responsive, with custom color schemes, typography, and social media icons.
 Features of the Simple Author Box Pro plugin:
- Not only can you add the name, website, gravatar, custom image, bio, and social media icons for one author, but with the Simple Author Plugin, you can create an author box for more than one author.
- Customization of an author box is done through an interactive and user-friendly interface.
- Every author box is fully responsive, so regardless of which device you are on, the author box will look fine adapted to the device’s screen
- Even though the plugins add an author box automatically without writing any code, if you want to modify something, you can always head over to “single.php” and “author.php” files and insert manually code.
- The default behavior of author boxes was made only to allow gravatar images associated with Gravtar’s account of a user. However, Simple Author Box extends that functionality and enables the authors to upload any custom image.
- If your website is based on RTL (right to left) languages, you can activate this option in the Simple Author Box, and you are good to go.
- Simple Author Box also allows you to add guest authors and co-authors (if two or more co-authors wrote the post).
How to Install the Simple Author Box Plugin
Generally, there are two ways to install any WordPress plugin, including Simple Author Box Pro. The first way is to download the plugin and upload it to the “Plugins” tab in the admin panel. The second option, which is significantly easier, is installing a plugin from the WordPress repository.
Installing the Simple Author Box Pro (Downloading)
 Download the .zip file of the plugin from this link.
- Go to Plugins > Add new
- Select the simple-author-box zip file and upload it
- Install the plugin and activate it once the installation process is done
Installing the Simple Author Box Pro (WordPress repository)
- Go to the “Plugins” tab and click on the “Add new” option
- In the search area, write “Simple Author Box”
- It should give you the plugin created by Webfactory Ltd
- Click “Install Now,” and activate the plugin after the installation
- Once the installation is done, the Simple Author Box tab will appear on the left side of the panel below the settings tab. You can navigate to this section and customize the appearance of the author box that you will use on your website.
Simple Author Box – Demos
Custom background:
 This is a standard Simple Author Box Pro look with no additional things added. You can see only the background image is different.
Custom HTML tab:
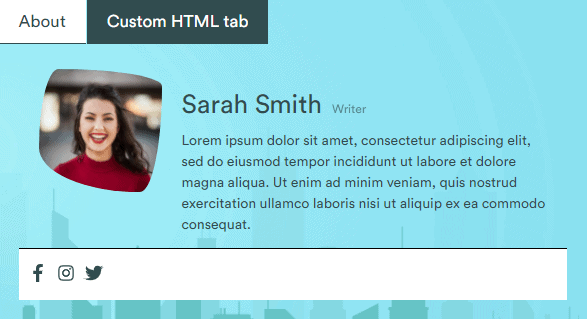 You can add custom HTML tabs within an author box if you need more freedom. You can use it to show some additional information or list out all the latest articles written by the author.
Conclusion
See, it is pretty easy to add an author box to your WordPress website, right? If you choose the manual approach to add WordPress author box without plugin, not really. Not only is it more difficult, but you risk leading to a complete crash of your website.
Therefore, it is highly recommended to use tools instead of inserting code directly into WordPress .php files. Check out the Simple Author Box PRO plugin and set up an author box in a few clicks.
No Comments