

10 Apr How to Add Icons To Your Navigation Menus in WordPress
WordPress Menus are boring. Do you feel the same? Then, we have a solution to spice up the navigational menu experience. WordPress is a versatile platform; it provides enough simplicity for the newbies to work with. And it also provides enough opportunities for the more advanced users to use the code and enhance the capabilities of already capable CMS.
With over 23% of World’s website running on WordPress and an amazing community, WordPress always have tons of resources for you to use. Today, we will go through the tutorial of how to add Image Icons With Navigational Menus in WordPress.
Let’s start the tutorial. Any users, who do not know coding and it is easy for basic users to use plugins rather than use coding to implement features.
Let’s start with the plugin, Menu Icons. The plugin came to light last year with the high emphasis on creating value for users. The user needs no coding skills and can easily add icons to the navigational menu –creating a wonderful experience for the users.
What makes the Menu Icon Plugin Awesome?
Menu Icon Plugin is awesome, and the sole reason is its simplicity to do a complex task such as including image icons in the navigational menu.
And, this is not what makes it awesome. The fact that it is the first plugin that handles the different aspect of incorporating the menu images without editing a single piece of code. I may be overstating the fact, but earlier plugins require some CSS manipulation to come to the desired effect.
With this plugin, everything looks amazing and cool.
To start our tutorial, you first need to download the plugin from the official WordPress plugin page: Menu Icons.
Installation is pretty simple; upload and activate just like any other plugin out there. After installation is completed, the next step is a move to the famous Appearance >>> Menus.
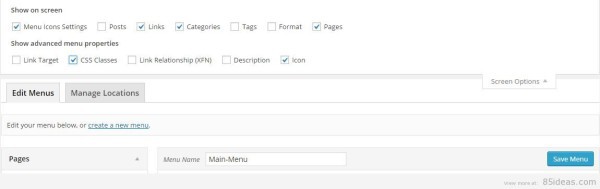
The plugin has induced a new meta box on the left-hand side of the Menu. The meta box is “Menu Icons Settings”. The Menu Icons Settings can be used to setup the icons for the select menu items. It’s simple and intuitive.
Select the required menu list item and click the select icon. Once you click the select icon link, a new window will popup asking you for choosing the icon for the menu you selected.
![]()
The new window contains a lot of icons from a different source. The source is Dash icon, Elusive, Font Awesome, Genericons, Image. These set of image icons will suffice all your needs for creating an appealing navigational menu for your WordPress website.
![]()
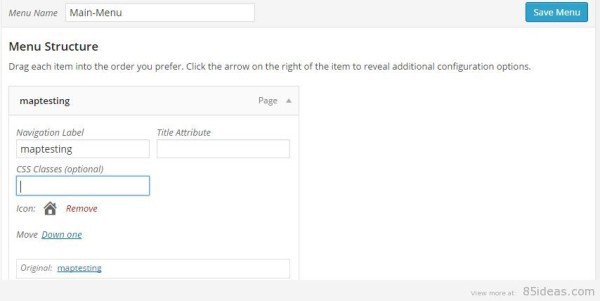
For the testing purposes, I didn’t have to go to other icon packs, but I am sure that they will suffice for all the different purposes. After you select the icon, there are some settings that you change before making the final call. ![]()
As the Image shows, you can easily select the font size, alignment, position and hide label feature. With the correct settings checked, you can move forward and save the menu.
My menu looks like as below, the testing is done on my test-site and hence, the menu looks awkward.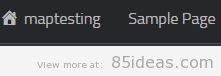
Pretty Cool? The process is quite simple, and I didn’t make any changes to the code. But, there is a catch. If the menu icons didn’t align them correctly, you might need to use another plugin, Simple Custom CSS to modify the plugin. The working of the plugin depends on the theme and in my case there was no need to implement the custom CSS.
Adding You Own Custom Image
Custom image loading is a little tricky. You need to modify the theme code, especially the functions.php file.
add_filter( 'menu_image_default_sizes', function($sizes){

  // remove the default 36x36 size
  unset($sizes['menu-36x36']);

  // add a new size
  $sizes['menu-60x60'] = array(60,60);

  // return $sizes (required)
  return $sizes;

});
Adding Icon Images Using CSS
If you are CSS ninja or familiar with CSS, then you can easily follow the next part of the tutorial that is targeted at the manual usage of CSS to get the desired result.
The first step includes uploading the image you want as the navigational icon image using the Media Library. Once done, you need to move to the Appearance >>> Menus and then check the CSS classes option.
Next step is to include the CSS Class that is necessary for the image to popup using the CSS. For now, let’s select it as testingmap.
After the CSS is set, the next step is to insert the CSS using the Simple Custom CSS plugin.
The following CSS will work fine. Modify it according to your requirements.
.testingmap {
background-image: url('http://www.85ideas.com/wp-content/uploads/xyz.png');
background-repeat: no-repeat;
background-position: left;
padding-left: 5px;
}
The only thing that you need to make sure to change the CSS class to the class name that you have entered into the CSS classes option in the menu part.
Wrap Up
Image Icons spice up the navigational menu. It can be quite surprising that these icons do add some UI advantage over the non-image navigational menus. Users find it easier to navigate.
Menu Icons is one of the best plugins out there. I also discussed the manual way to add the icon images to the navigational menu.
Stuck following the article? Comment below and our expert team will help you through the problem.
No Comments