

27 May How To Install WordPress Locally Using WAMP
If you are WordPress developer or a designer or even a webmaster, then you must be wondering on how to install WordPress locally. Every beginner asks this question and gets puzzled by the complexity of the process.
The good news is that installing WordPress locally is easy with the help of tools. All you need is patience and working knowledge of your respective environments.
The tutorial is based on Windows platform using WAMP.
How To Install WordPress Locally Using WAMP
So, why you want to install WordPress on your local machine. There can be many reasons that demand a local installation.
- You are testing a new theme or plugin before making it live.
- You are developing a theme from scratch or a plugin. The testing environment is necessary for a successful development and local environment makes it easier for developers to test their work on regular basis.
- Learning WordPress — If you are learning WordPress, it is quite natural to install WordPress locally and work according to your environment.
Is the local website live to the others?
The most common mistakes that beginners make is that they fail to understand the difference between the local WordPress installation and live WordPress hosting. The local WordPress installation only open for the users of the local machine. If you are connected to the LAN or a Wi-Fi network, then also the members of the network can access the website.
Hosting WordPress website live requires hosting and you need to either buy a WordPress hosting or host it on free WordPress hosting servers(not recommended as they are extremely slow).
Installing WordPress Locally On Your Machine Using WAMP
The first step is simple; you need to go to the official WAMP website and download the WAMP software(32-bit or 64-bit depending on your Windows version).
download WAMP Image -1
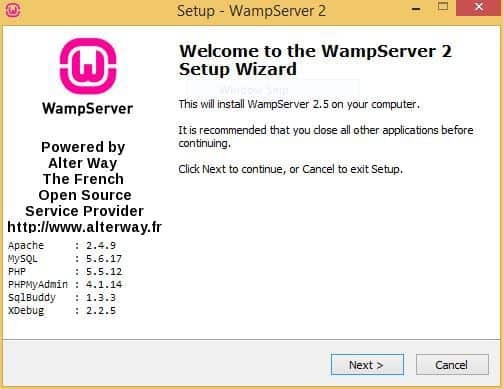
After you download the appropriate WAMP version, you need to install it on your machine, by following simple steps.
1. Double Click or Right Click and then click Open. You should have administrative privileges to open the downloaded software, in this case, Wamp.
2. After successful double clicking the Wamp Software, you will be presented with the install wizard, just as shown below.
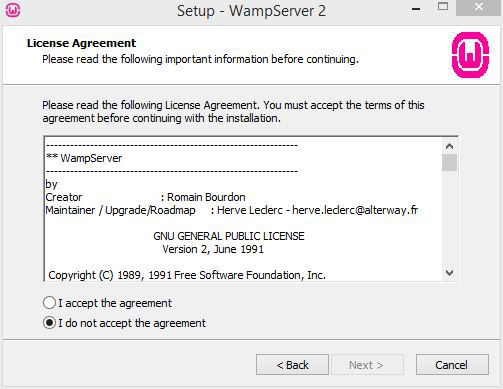
3. Accept the license agreement and click ‘Next’ to proceed further.
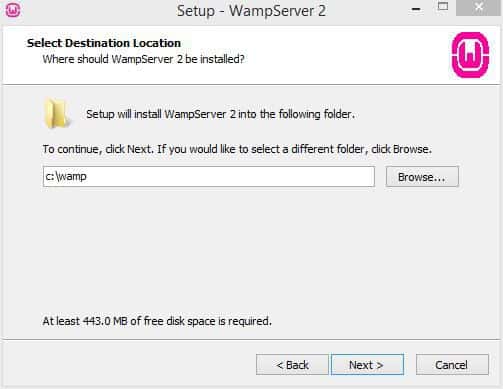
4. Choose the installation directory on your hard disk. In this case, I choose ‘C:\wamp’. You can choose any other directory, but it is recommended to go with the default settings. The installation will require 430 MB of disk space. Make sure you choose a hard drive that have the sufficient space for installation.
5. The next step requires to choose to create a desktop icon and a quick launch icon. I ticked both of them for quick access. Press Next to proceed.
6. The last step in the ‘actual’ installation is to rectify all your choices. It will ask you proceed or move back to change the settings. I will proceed further and click, “Install”.
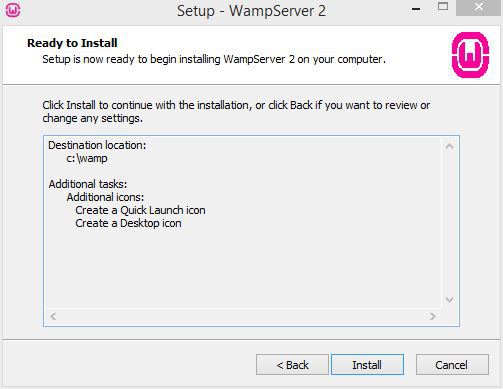
The installation will take some time to complete. In my case, it took around 2 minutes for me and that’s it.
One last step is to link your browser.exe to the Wamp. I choose Google Chrome. The Google Chrome EXE is located in C:\ProgramFiles(x86)\Google\Chrome\Chrome.exe.
The 2nd phase of installation will start here.
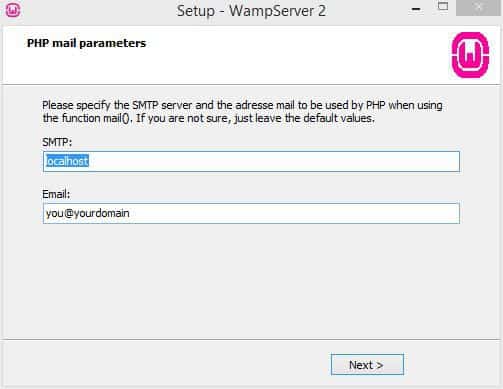
You will be asked to choose SMTP server and email. As this is a local installation, it is wise to just click next and move forward.
And, Woosh, you have finally installed the Wamp Server to your machine. Click Finish to launch the WampServer 2 Now!
The small Wamp Server Green Icon will be shown in the right corner of the Windows taskbar.
To verify the installation, open localhost by typing, http://localhost/ in your favorite browser. The page will look like the following.
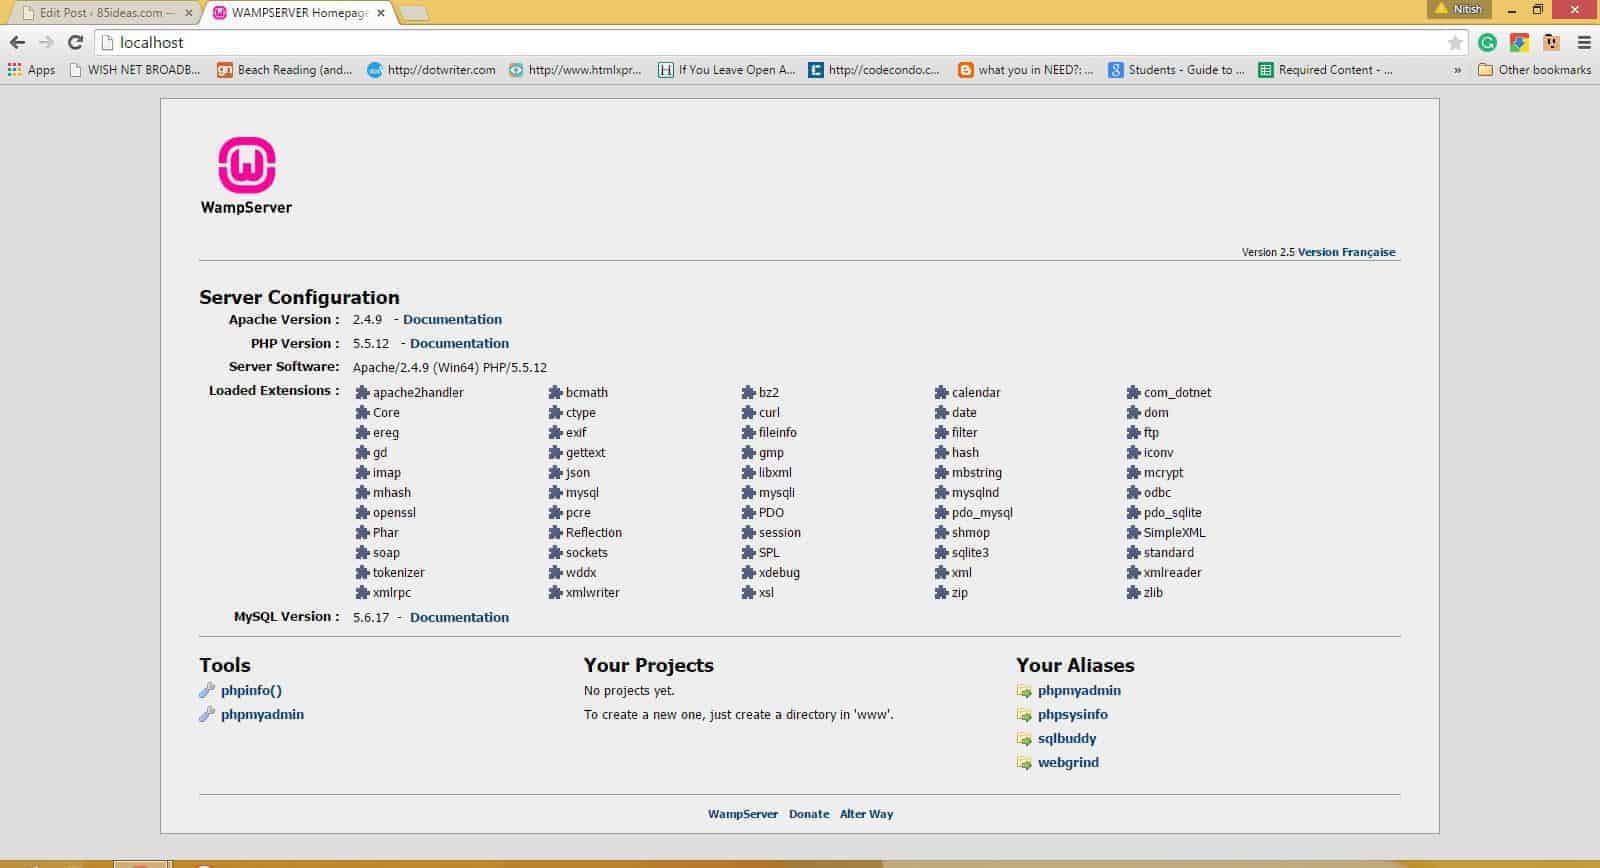
The installation is complete and verified.
Installing WordPress On Your Machine
Now, comes the times when we start dealing with the actual package, the WordPress! To install WordPress, you need to download WordPress from www.wordpress.org. Choose the latest version to download. In this case, I choose WordPress 4.2.2, whose package size is only 6.5 MB.
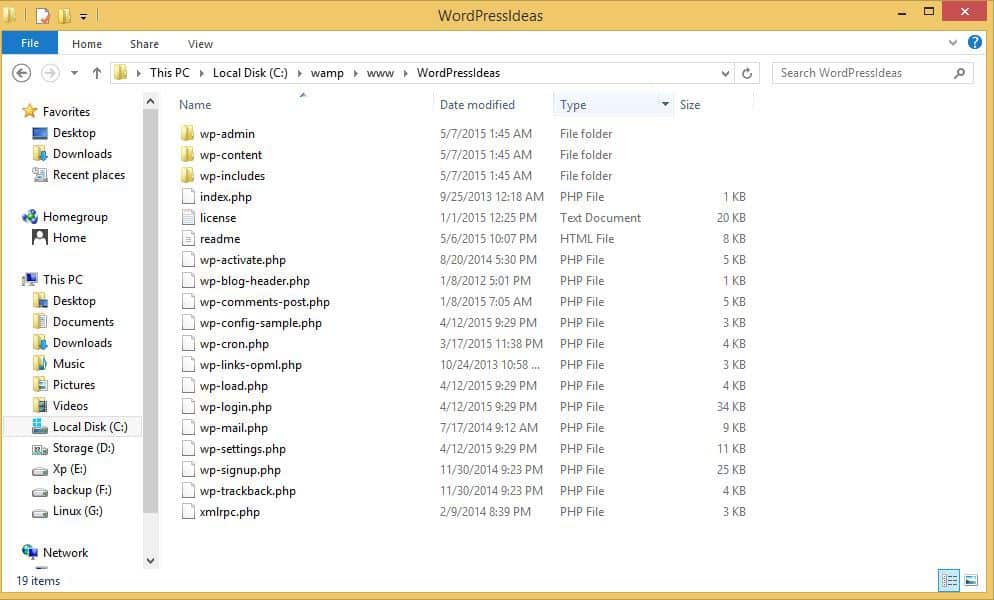
1. After downloading the WordPress files, you need to copy or cut the RAR file into the core of your WAMP installation. The right place is
C:\wamp\www\WordPressIdeas.
WordPressIdeas is the folder, created by me for keep the WordPress files. You need to extract all the files into the folder. So that the content of the WordPressIdeas looks similar to the below picture.
2. Next step includes creating a database for the local WordPress website. To do so, type the following link in your browser.
http://localhost/phpmyadmin
3. A new window will open and you need to click on the Database tab. Next, you need to type in the database name and type create. Remember or copy the database name. In this case, the database name is ‘ideaswordpress’

4. Open localhost and click on the folder you created(wordpressideas). This will start the WordPress installation and you will be on your way in no time.
5. The next major hurdle is to fill all the details of the WordPress blog.
- Database name — enter the database name
- Database username — the username desired by you
- Database password — set a strong password
- Database host — leave the field as it is.
- Table prefix — leave the field as it is.

6. Finally, you have completed the WordPress installation locally using Wamp server.
Congratulations and now it’s time to experiment as much as you can with you WordPress website. The Local installation brings lots of advantages and I hope you enjoyed the article.
Don’t forget to share the article with your friends and peers. Keep in touch and also comment! We would love to solve your problems :).
No Comments