


04 Mar How to Properly Setup W3 Total Cache and CloudFlare
No doubt, W3 Total Cache is the best performance improvement plugin a WordPress user can get and to make the deal even sweeter, you can opt for the free CloudFlare account, integrate the two, and experience even faster-loading websites. And yes, this thing, literally works!
But I guess, you’re already aware of this story (one can even call it a fact), and the only thing left is to know how to properly setup W3 Total Cache and CloudFlare, right?
Well, I’m not going to tell you that you came to the right place, or whatever, but I’ll try my best to share what I know to make this integration work in your favor. I’ve been using WordPress since last six years and have been a user of CloudFlare since the last couple of years. So, I’m just sharing what I know best or in other and direct words, what worked for my case to improve the performance of my sites.
Let’s begin!
Properly Setup W3 Total Cache and CloudFlare
The procedure is simple and I don’t expect you to know each and every technical aspect of this method (even I’m not aware of every term, only a developer can help you with that). Rather, you need to follow a simple set of procedure and it will get the job done.
Step 1 – First and the obvious step is to install W3 Total Cache (you can easily find it at official WordPress.org repository) and meanwhile, sign up for an account at CloudFlare. Unless your website is getting millions of hits every month, you don’t need to pay anything. Yes, it’s free to use at the beginning!
Step 2 – The moment our champion plugin gets installed, the procedure begins. Activate the plugin and move into the General setting under it’s heading in the left sidebar.
Step 3 – Now, whether you like to enable the first option or not, truly depends on you. It’s the Preview mode, which once enabled will help you test the settings before finally applying it. Personally, I always keep it Off. So, I’ll recommend the same!
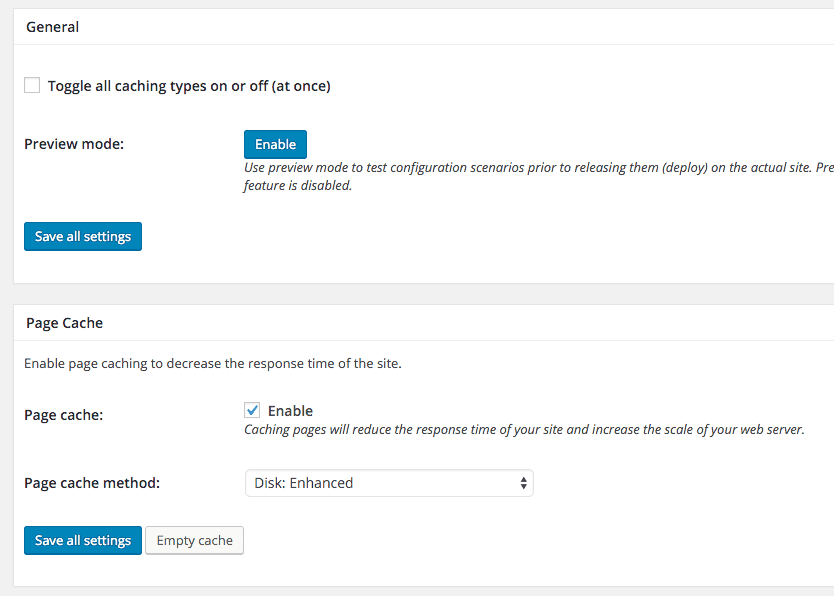
Step 4 – Moving ahead, you need to enable the Page cache option (check mark) and select ‘Disk: Enhanced’ as the Page cache method. For your ease, click on Save all settings button before moving to next option.
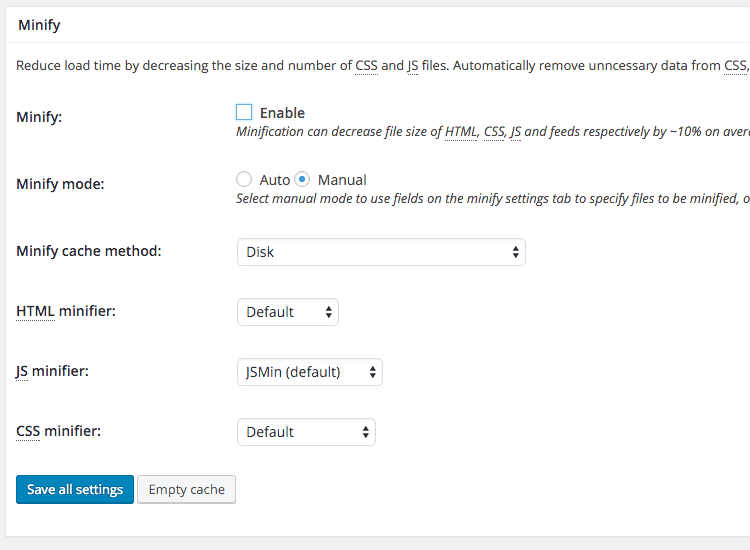
Step 5 – Now, keep the Minify option Disabled as these requests will be handled by the CloudFlare network.
Step 6 – Now, you need to Enable Database cache and select Disk as its method. This will reduce the database query sizes and will bring down the page load speed even further.

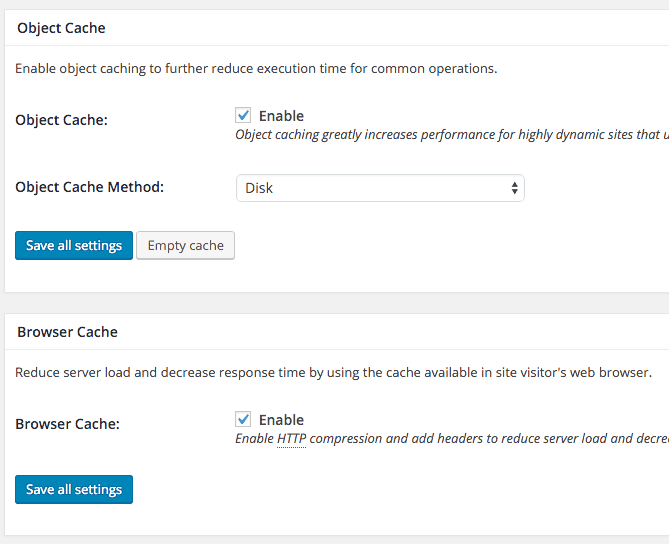
Step 7 – Enable the Object Cache and again select, Disk as the method.
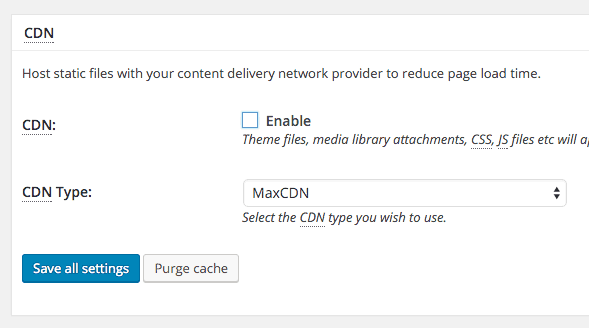
Step 8 – Now, at the CDN section, do not select any from the drop-down and leave it default. This option is generally used in case of paid CDNs like MaxCDN, etc.
Step 9 – Hit the Save all settings button, and if you wish to move into the details of these individually, then you’ll find related options at the left side, underneath the Performance heading. I’ll recommend checking this perfect guide to help yourself further.
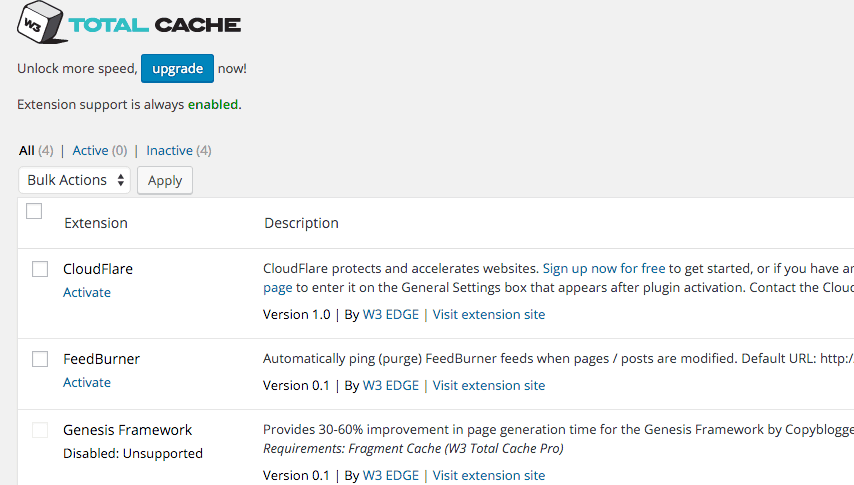
Step 10 – Move into the Extensions section, and you need to Activate CloudFlare extension from the list over there. After you click on that activation button, you’ll be asked to login into a CloudFlare account (Sign up if you don’t have one, it’s free) and then get an API key to complete the configuration between the two.
Step 11 – Login into your CloudFlare account, and under the settings, you need to input few things, if not available already. Enter your primary domain URL (website URL) under Zone section. Adjust the Security Level, which I’ll recommend keeping at the lowest possible level.
Note – CloudFlare not only offers its free CDN services to anyone but also offers a kind of security layer without any charges. This additional layer keeps away malware and other unauthentic access to your websites. Theoretically, it’s a good feature to have, but most of the times it end up blocking the normal visitor of your website. This is the reason why the Security Level has to be kept minimum unless you don’t worry about the visitor’s experience, that much.
This is all you need to do to properly setup W3 Total Cache and CloudFlare account, probably to get a better performing website. The reason why this step you took, is a good one, is because a fast loading website always ranks at a better position in search engine result pages.
Google has been telling webmaster since the last couple of years, to improve the performance, and bring down the page loading time, to maintain the user experience. And, they even consider it as a ranking factor.
So, here you go! Now you’re aware of a complete working procedure and hopefully within 5-10 minutes, your website will also be having a superior page load, or will, at least, experience an improvement.
Don’t forget to share your experience with this plugin and CDN integration and whether or not you found this guide helpful and easy to understand. See you in the comments!
DMati
Posted at 13:48h, 12 MarchEnable database i object cache on typical hosting is a bad idea!