17 May How to Easily Add Google Forms to WordPress!? – A Complete Guide
Forms are excellent means of collecting information online. Any forms from contact, subscription, and survey to checkout pages are very handy additions to your WordPress website. Namely, by having a Google account, Google Forms will enable you to create and add forms to your site for free. But, you are probably asking yourself how to do that? Believe me – there’s nothing to it!

Just continue reading and find out what the two options (explained in depth) for adding Google forms to WordPress are:
-
Table of Contents
Add Google Forms to WordPress Manually
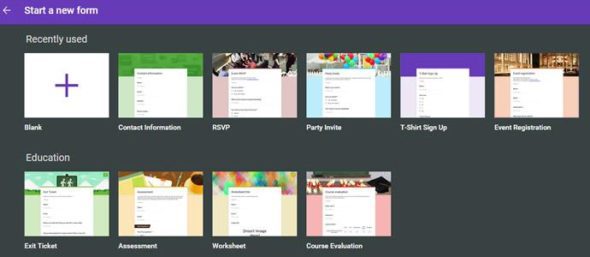
Your first solution is to go to the Google forms website and choose Create a form for which you should have a Google account. Here, you would have two options, either choose one of the available Google form templates or build a new one.

If you chose the first option, we’ll imagine that you chose the Course Evaluation form, yet the same applies to any other form.
At the side, you’ll see a Floating menu for modifying and customizing the form. In fact, you can insert images, videos, more questions, title, description, or even create your own sections.
When it comes to questions, they can be set in different formats including dropdowns or linear scale and multiple choice. All of them can be dragged and dropped wherever you want. Plus, you can choose a visual theme design or add a logo. What’s more, you will be automatically provided with a color or theme choice.
Furthermore, there’s a skip logic option to your questions, custom confirmation page, add-ons, and live preview. Sounds amazing, doesn’t it?
Once you’re done configuring, click on the eye icon at the top in order to preview the form and click on the Send button if you are satisfied with it. Then, on the next screen, you’ll be given many options on how to access the form, including the following:
- Copy the iframe code and paste it into WordPress
- Share a link with other people
- Email the form yourself
Now, as our goal is to add Google forms to WordPress, you should choose the first option and paste the code into your new post. Once you’re done with this, preview and publish your post.
If you chose the second option – build a new form, go to your Google Drive and click on New at the top left corner. Next, find the More option, click on it, and it will lead you to Google Forms where you can create your own form.
-
Add Google Forms to WordPress with a Plugin

Your second solution for adding Google forms to WordPress is using a plugin. But, why go for this one? Namely, if you choose the first solution, you will get a form that remains in Google’s default style. You won’t be able to apply CSS and blend it with your theme.
Hence, if you want to apply a form that better fits your WordPress site’s style and brand, you should try using the Google Forms WordPress plugin. It allows you to add and manage forms via the WordPress admin area. Plus, it applies your forms better and provides tons of options to style and modify your Google form according to your liking.

And, it directly embeds the form in your pages or posts and removes the Google wrapper HTML. The best thing is that once you install and activate the plugin, it is super easy to use. Your WordPress menu on the dashboard will include a Google forms item.
First, click on Add New Google Forms and copy the URL of your Google form and paste it into the Form URL box. Then, complete the rest options to fit your website style and change the text on the confirmation page if you want to.
Next, publish your Google form, copy the shortcode, and paste it in the text editor in a new post. Yet, bear in mind that the look of the form doesn’t depend on your website’s theme or custom CSS added by the configuration options.
However, you should know that these forms aren’t intended to work for private use because the Google Forms WordPress plugin only supports published Google forms.
Finally, this plugin features a form submission log section which enables you to view all the responses collected together with the timestamp and URL. This is important for statistical insights. If or when you don’t need such records, you can delete them all.
Alternatively, view the responses on your Google drive. Just open your drive, access the form, and click on Responses in the top menu. Here, you can view the responses in a spreadsheet format by clicking the + icon, choose a destination, or download them in CSV format, and delete them all via your drive if not needed.
_
Thank you for your attention. We hope you found this tutorial helpful. If you need additional help, or you have any questions regarding this WordPress tutorial, please do not hesitate to contact us below in comments, and we will do our best to help you in any way we can.


No Comments