24 Apr WordPress Child Themes – The Ultimate Guide
As you already know, your website’s theme choice represents and reinforces your brand. In WordPress, there are thousands of free themes and a great number of premium ones. So, why build one from scratch? Of course, you might need to personalize and customize it, but you don’t have to create a completely new one (which is a time-consuming task). The perfect and conventional approach would be to create Child Theme. So, let’s get started and find out how to create it, in order to customize your WP website.
There’s nothing complicated and difficult about creating a child theme. You’ll only need a file called thestylesheet, so that WordPress can recognize a child theme. Yet, in order to ensure that this file is recognized on page load, a function file needs to be added.
Below you can find a step by step guide on how to create a WP child theme:
- Create a Skeleton
First and foremost, you should create a separate child theme folder in wp-content/themes. Then, as we already mentioned, you should add two more files:
- css – the child theme stylesheet
- php – the function file added
- Link the Parent Theme
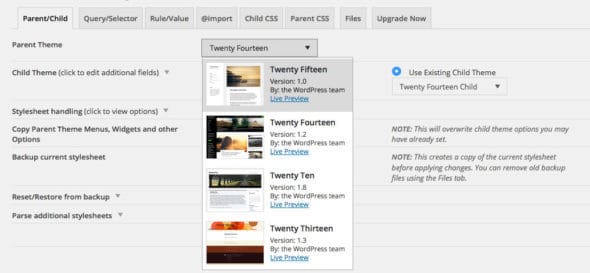
The second step is adding a child theme stylesheet header to style.css. The header’s template attributes give a description of the child theme and link the parent and the child theme. Any template files that aren’t included in the child theme are acquired from the parent theme.
So, you can conclude that the template attribute is the most important feature of the child theme’s style.css file. Any other attributes are optional, yet preferable.
In order to get your child theme started, you should add the name, description, and template name to style.css. Save these changes and you’re done. The child theme will appear in the WP admin panel on your theme’s list.

- Enqueue the Stylesheets
To make sure that all of the files are loaded properly, you should enqueue them using functions.php and the following hooks: wp_ enqueue_scripts and wp_ enqueue_style. Plus, there are two functions for fetching the path of the parent and the child theme: wp_enqueue_scripts and wp_enqueue_style.
Now you can say that your child theme is officially completed. Still, if you want to override the styling and functionality of the parent theme, continue reading and find out how you can do that.
How to Easily Override the Parent Theme Styling?
You can override the parent theme styling by simply making some changes in the child theme stylesheet. Let’s say that there’s a class wl-header, which makes the header white, in your parent theme stylesheet and you want to change it. You should just redefine the same class and the attribute in your theme’s style.css file.
And, what’s even more interesting – you can not only change the existing classes but also create new classes according to your liking.
How to Override Parent Theme Templates?
If you want to add a sidebar, change the footer, or make other changes regarding page layout, you should override template files. To do this, you should add a file in your child theme with the exact same name as in the parent theme.
For example, if you add a header.php file in your child theme, it will override the parent’s header.php. Similarly, you can just copy the template file of your parent’s theme to your child’s theme and add a line of code. Simple, isn’t it?
How to Override Parent Theme Functionality?
Changing the functionality of the parent theme requires adding a code to the child theme’s functions.php. Yet, bear in mind that this won’t override the functions.php of the parent theme. Instead, it will simply add extra functionality.
However, you can achieve this and override the parent theme’s function by defining both of them with the same name. Furthermore, you can extend the functionality of your parent theme if you use its action and filter hooks if present.
_
Thank you for reading this article. We hope you found this step by step tutorial useful. If you have any questions regarding this article, or need additional help, please do not hesitate to contact us below in comments, and we will do our best to help you in any way we can.


No Comments