

05 Mar How to Integrate MailChimp and WordPress
Since we are talking about implementing a simple to user tool, MailChimp into already simple WordPress, so you can expect things to be straight and easy. However, there are many things to take care in your daily WordPress management life, so here is a detailed guide to help you get everything setup without reading anywhere else, or trying things on your own.
This is a guide to help you easily integration MailChimp and WordPress. Now in the case of WordPress, the easiest way to implement a third-party functionality is using their plugins, right?
Implementing MailChimp on WordPress is sure not that easy as it sounds like because of the available number of options you need to go through and tweak. But a person with basic knowledge of email signups, WordPress and how things work with MailChimp can easily save himself some time.
Table of Contents
Integration MailChimp and WordPress
Well, that’s what we will be done right here. Follow me!
Step 1 – Head over to this web page and read the details about MailChimp for WordPress plugin. It comes in both free and premium versions and has been used by millions of users till now. Before moving to the next step, do check that the recent version of this plugin is matching with the running WordPress version of your site.
Step 2 – Once you’re confirmed that the plugin is legit, go ahead and download it. Upload the same into the Plugin uploader (or you can directly search for it using the Add New section underneath the Plugins setting) and finally activate the same.
Step 3 – The moment this plugin gets activated, a new set of Settings will appear on the sidebar at Dashboard area. Click on the same to open rest of the options hidden underneath.
Step 4 – Now, the first thing to input is the API key to allow this plugin for accessing your MailChimp account. Once you sign up for an account, you easily get an API. Please ensure that you’re entering the particular API, in the case of running multiple lists for multiple blogs/sites.
Step 5 – Now, you’ll have tons of options to choose and customize the list building tool you just installed. You can go with any options you like, not to mention which functions properly. One thing to note here is that it’s just a basic setup, not the entire options which MailChimp holds under its sleeves.
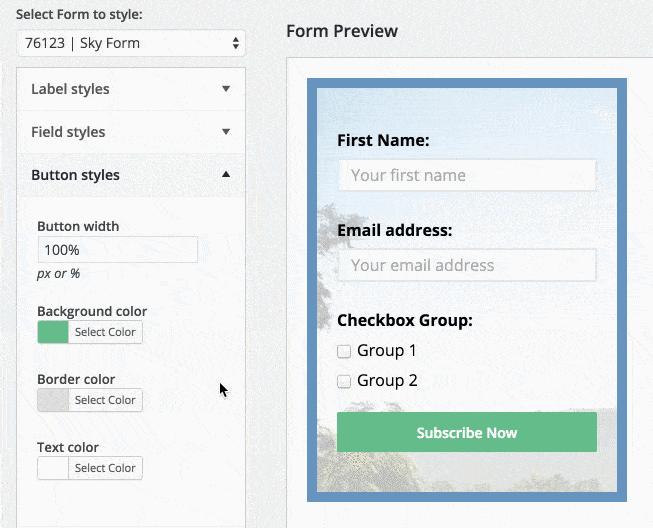
Step 6 – Now, create a new Form, and start customization how it looks and how it functions when published. For example, the field labels, different HTML form, and few common MailChimp settings which were left untouched earlier. This part also holds HTML customizations, so if you’re looking for a brand new look, then this is the place to write your code at.
Step 7 – Finally, you’ll have two options to implement this new Form you just created and the settings it holds. You can either put it live via Widgets on any section your theme allows for widgets, or you can put it anywhere using the Shortcode it generates.
This sure is the simplest method available for everyone but it isn’t the only one. You can go with the old-schooled method which was available before this plugin was introduced. Yes, the method to implement a custom code of MailChimp by yourself.
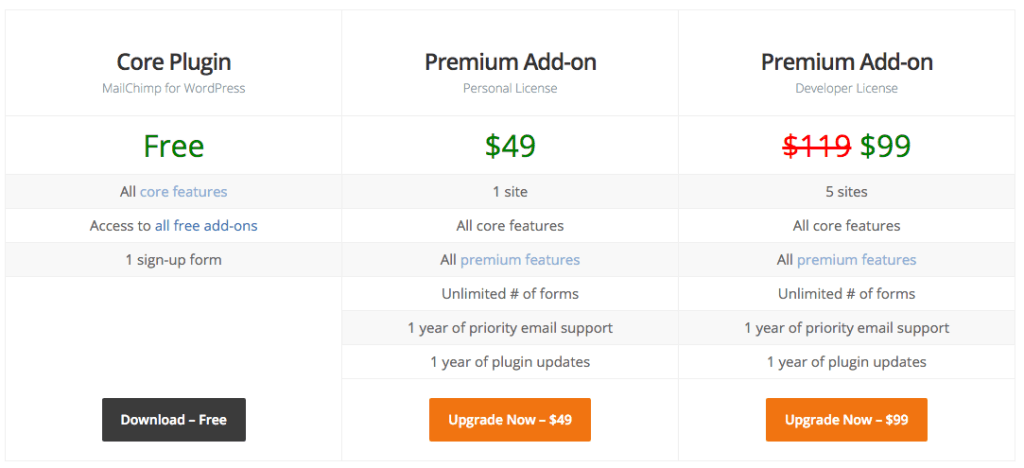
Coming back to the plugin, it comes in two versions, free and premium. The premium one, of course, offers a bunch of additional features which makes the plugin even superior, functional and totally worthy of the chance you’ve given.
Method #2
That old-school method is still available and to use that, you need to follow below-mentioned steps.
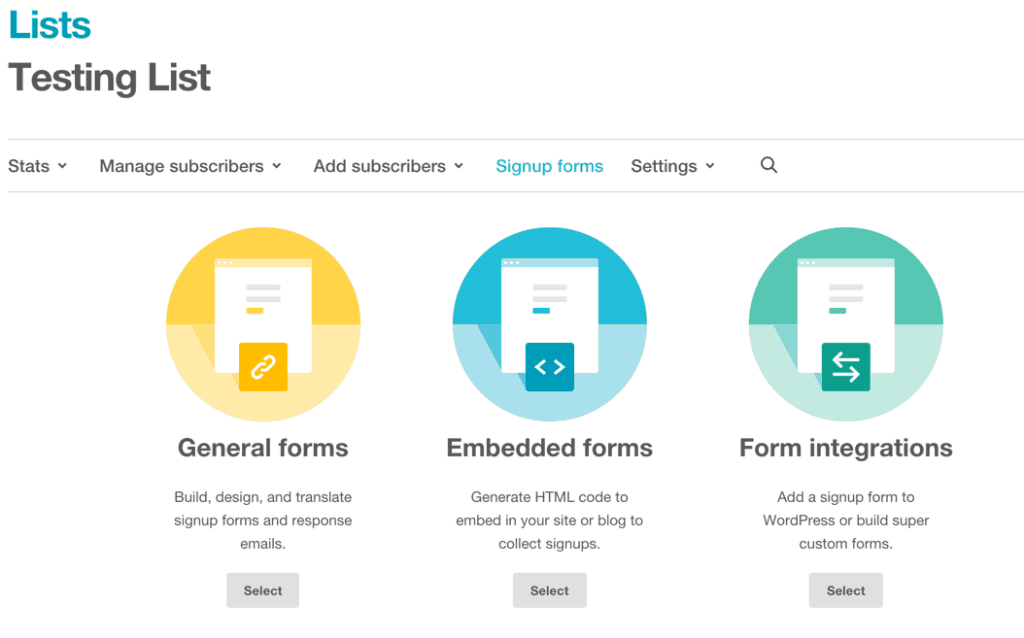
First step – You need to sign up for a new MailChimp account (or login using your existing one), and access the section which says, ‘Signup forms.’
Second step – Over here, you need to pick the one which claims to offer you an HTML code of the form, and after the selection put in the customized settings you wish the code to hold. One important thing to note here is that, if you wish to create gorgeous, unique and very hand-made forms, then you definitely need to be expert in HTML or hire someone else.
Third step – The moment you complete the customizations and proceed, an HTML code will be offered. Copy it and either leave it in the clipboard or paste it into a Notepad file for future reference.
Fourth step – Finally, paste this code on any page or section where you wish it to work. Make sure you paste it in the back-end side, not at the front end side.
Fifth step – Save the changes and publish the page which holds the new integration and the MailChimp will be active on your WordPress website.
Since this method is little tricky, you might find yourself stuck in any of the aforementioned steps. In any such case, you need to make use of Support offered by MailChimp or find a good forum to drop the question.
A prime benefit of using the second method is that it helps to keep the number of plugins limited by one on your website which improves its performance and security.
Final words
Before you choose any of this method, make sure you have a blog with quality content or a website selling/recommending a quality product. Otherwise, people will find hard to sign up for the newsletter you’re offering.
The last thing left here is the deep level of settings which we missed in a hurry. Fear not, you can access them from your MailChimp account and make sure each of them is set according to the requirements you have.
If you have any questions, feel free to leave it in the discussion section. Now, it’s your time to share thoughts!
No Comments